
Identification
Read wing bars without losing the whole bird
Locate wing patterns and distinguish visible absence from a hidden mark.
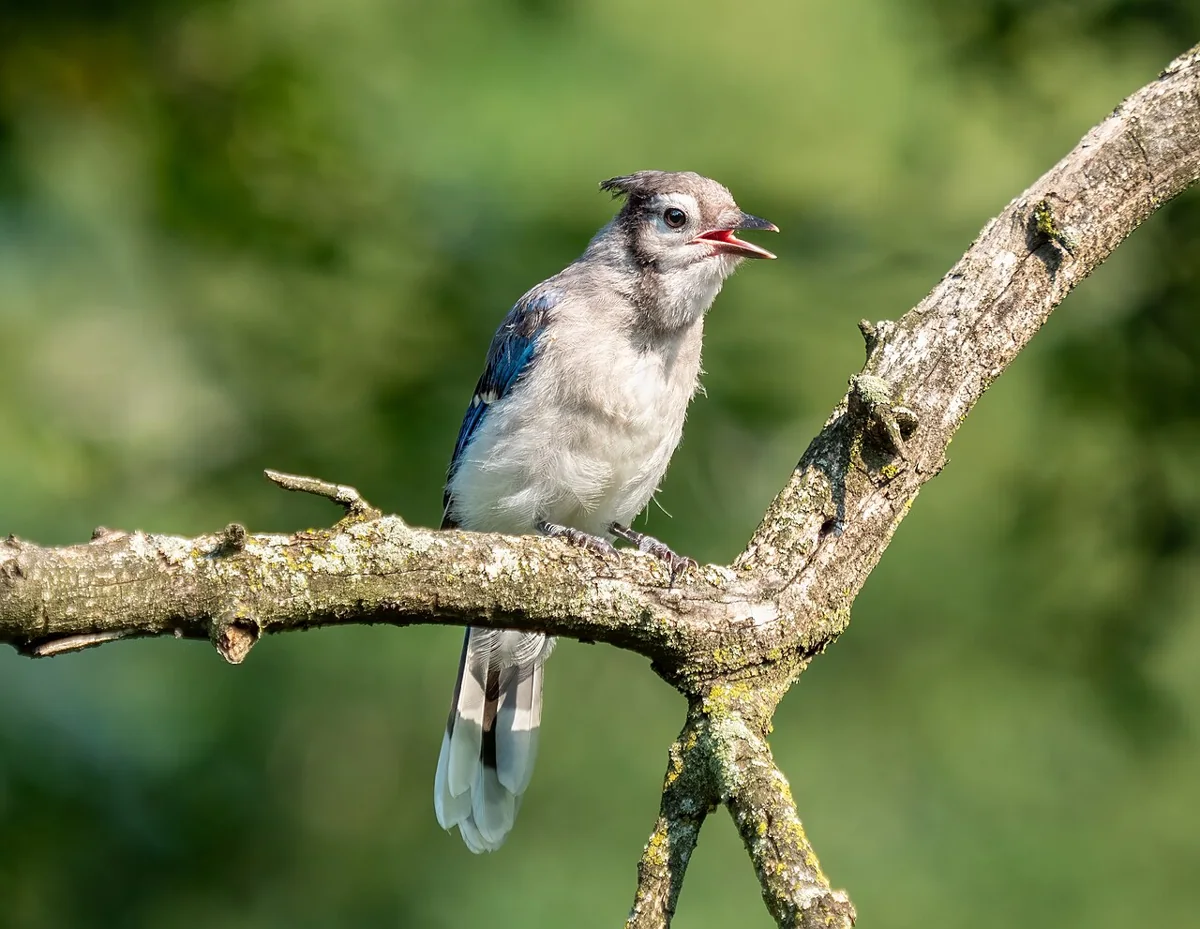
A white mark on a folded wing can be a narrow bar, a broad patch or a pale edge on an individual feather. Those descriptions lead to different comparisons in a field guide. Before counting white lines, find the wing itself and notice how it lies against the body. A pale stripe on the back or a branch across the bird can otherwise become an imaginary wing mark.
Wing patterns are especially helpful when two birds share a similar body shape. Missouri’s identification guide uses the relatively plain wing of Eastern Phoebe and the wing bars of Eastern Wood-Pewee as one such comparison. That example illustrates the value of placement. It also raises an important question for every encounter. Was the relevant part of the wing visible well enough to judge?
Locate the folded wing before naming a mark
On a perched bird, the folded wing usually forms a distinct surface along the side behind the shoulder. The breast and flanks sit below and ahead of it, while the back continues above. Watch the bird turn slightly and trace those regions. You do not need advanced feather terminology to describe a pale line crossing the visible wing or a larger light area nearer its base.
Start with the broad pattern. Is the surface mostly uniform, striped, spotted or crossed by a contrasting patch? Then add the number and relative positions of obvious bars. A description of two narrow pale lines on an otherwise dark folded wing tells you more than “some white.” Keep the description proportional to the view, especially when foliage interrupts the outline.
Distinguish bars, patches and edging
A wing bar appears as a contrasting line across part of the folded wing. A patch occupies a broader area. Edging follows individual feather boundaries and may produce a delicate lined appearance. Photographs can show all three effects clearly, but a bird moving quickly may let you see only the strongest contrast. Record the level of detail you could resolve.
American Goldfinches offer a useful practice subject where they occur. Even dull winter birds can show conspicuous contrast on the dark wings. Compare several labeled photographs across seasons and look for where the pale marks sit. This exercise helps connect the less colorful bird with familiar wing patterns without relying on the bright yellow body of a summer male.
Blue Jays provide a different pattern. Their wings combine blue, black and pale areas, with broad contrasts that can remain noticeable when the bird moves. A distant pale flash still needs confirmation of which part of the bird produced it. The folded wing and the tail may contribute different white marks during the same flight.
Observe both the resting and moving bird
A folded-wing view and an open-wing view reveal different surfaces. A patch obvious in flight may be largely concealed when the bird perches. The Northern Mockingbird’s striking pale wing flashes illustrate why a familiar resting bird can look unexpectedly bold once airborne. Follow one individual through the transition whenever the view allows it.
Do not assume the pattern disappears biologically when it disappears from sight. A bird can turn, tuck the wing more tightly or place it behind the body. Mark an area as hidden rather than plain when its feathers cannot be inspected. That distinction helps prevent a brief unsuitable angle from excluding an otherwise plausible candidate.
Judge absence more carefully than presence
A clearly seen pale bar is positive evidence. Failing to notice one is more ambiguous. The bird may have been too distant, the light too harsh or the view too brief. Before describing a wing as unmarked, ask whether you saw its whole surface sharply. An unobstructed side view gives that statement a stronger basis than a glimpse of a fleeing bird.
Use a small visibility note alongside the pattern. You might write “two bars seen on left folded wing” or “wing area in shade, bars unresolved.” These phrases also help when reviewing photographs later. A picture may support the first statement, while a blur can explain the second without forcing an identification either way.
Allow for wear and changing appearance
Feathers do not keep an identical appearance throughout the year. Wear and replacement can change the prominence of pale edges and other contrasts. The effect depends on the species and feather group. Use reference images from an appropriate season, and avoid treating the crispest illustration as the only possible appearance.
Light can produce another change within seconds. Pale gray feather edges may reflect strongly and look white from one direction. Deep shade may suppress the distinction between dark and pale areas. If the bird remains visible, compare the same wing after a natural turn. Stable placement across views deserves more weight than a momentary bright reflection.
Make a sketch that answers one question
Draw a simple oval for the folded wing and place the strongest marks inside it. Indicate which end faces the head. Add the tail separately, even if the shape is rough. The aim is to preserve position and number, not produce an illustration. A quick diagram can reveal that you remember one bar clearly but have only a vague impression of another.
Afterward, compare your sketch with several candidate species. Look for agreement in the whole arrangement, then consider body shape, head pattern, habitat and season. If a candidate requires a mark you never observed, keep that requirement open. The sketch should help you examine the decision rather than encourage you to redraw the sighting until it resembles a favorite possibility.
Carry the comparison into the next encounter
Choose one question for your next ordinary view. Perhaps you need to know whether a pale feature is a line or a broad patch, or whether a second bar is present. Wait from a comfortable permitted position for a view that can answer it. A short, well-directed look can contribute more than repeatedly checking an unsuitable angle.
Once the wing pattern is clear, return to the whole bird. Wing marks belong alongside structure, voice and local occurrence. Learning to describe them accurately reduces the number of candidates and makes guide comparisons more precise. It also leaves an understandable record when the bird departs before you can finish the identification.
Keep exploring
Start with the silhouette: size and shape
Separate structural clues from uncertain distance estimates.
What a bird’s bill can tell you
Use bill proportions without treating diet as a species verdict.
A practical map of bird head markings
Record eyebrow, eye line, crown and throat as separate observations.